Tuesday, May 31, 2011

Computer to TV Troubleshooting


The biggest problem with connecting your computer to your TV is that, generally speaking, computers and TVs don't display at the same resolutions. For example, the closest thing to the HDTV resolution 720p (1280 x 720) is a monitor display mode called XGA (1280 x 960). Not quite the same. And the closest thing to 1080p (1920 x 1080) is a monitor display mode called WUXGA (1920 x 1200). Again, not quite the same.
The result, in most cases, is something called overscan, where the full computer screen image doesn't fit on the TV screen. Overscan is a bigger problem on SDTVs where the native screen resolution is much smaller than your computer's display. If you're going to use an SDTV as a monitor, plan on lowering your screen resolution to 800 x 600.
HDTVs also have overscan problems, but usually only the very edge of the computer image gets cropped. A bigger problem with HDTVs is when the TV refuses to display a signal that doesn't fit its native resolution.
Luckily, most HDTVs have the ability to scale incoming signals to match their native screen resolution. This involves either upconverting lower-resolution signals in the attempt to bring the resolution up to high definition or downconverting higher-resolution signals for lower-resolution screens. It's not perfect, but for most casual viewers, there's little to no noticeable loss in image quality.
In rare cases, the HDTV won't recognize the resolution of the signal sent by your computer. When you connect an external display to your computer, most graphics cards will automatically try to find a good match for the display's native resolution. If this doesn't work, you will probably need to edit your resolution with third-party software.
Two programs are considered the best solutions for solving connectivity problems between a computer and a TV: PowerStrip for Windows and DisplayConfigX for Mac. Both of these programs allow you to match your graphics card's resolution precisely with the native resolution of your TV. If your HDTV is 1080p, you can go into one of these programs and switch your computer's resolution to 1920 x 1080, even if this wasn't previously an option.
Avoid increasing the refresh rate on your graphics card, unless you have a 120-hertz HDTV. If you send a signal with a refresh rate over 60 hertz to a normal HDTV, you could damage the TV ..........

How to Assemble a Computer

In assembling a computer, the main points to consider are purpose, availability, compatibility, and cost. Before building a system, ask these questions: What is the computer needed for? Are the parts for this computer available? What is the compatibility of the parts? Is this computer within the budget? The answers to these would serve as a guide in assembling the right computer.


Materials Needed:
- One (1) motherboard
- one (1) compatible processor with cooling fan
- one (1) compatible memory module
- one (1) tower casing with power supply
- one (1) graphics card (if the motherboard does not have a built-in video adapter)
- one (1) compatible hard disk for storage
- one (1) CD/DVD-ROM/RW drive
- one (1) ps/2 or USB mouse
- one (1) ps/2 or USB keyboard
- one (1) CRT or LCD monitor
- one (1) Philips screw driver
- one (1) pack thermal paste or grease


Step 1
When all the parts of the computer have already been selected and checked for compatibility, begin by laying all the components on a flat surface. Make sure that they are placed on anti-static sheets or wrappers (the sheets they are packaged in, for example) to avoid damage due to electro-static discharge. Also, avoid touching any leads or any exposed metal on any component.
Step 2
Take the processor and carefully place it on the CPU slot of the motherboard. Take note of the correct positioning of the processor. Avoid touching any lead of the processor to avoid damaging it. Refer to the motherboard manual for the correct placement.
Step 3
Apply thermal paste to the cooling fan of the processor. Spread the compound evenly on the metal surface. Install the fan on the motherboard, following the instructions on the motherboard’s manual. Take care in doing so to avoid damaging the processor. Connect the CPU fan’s power to the appropriate pins on the motherboard. Refer to the manual for the correct pins.
Step 4
Place the motherboard in the tower casing and screw it in place. Install the back panel that came in with the motherboard on the casing. It should fit the rectangular hole at the back of the casing.
Step 5
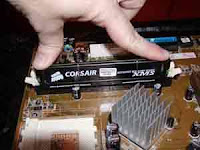
Insert the memory module in the memory slot of the motherboard. Locate this on the motherboard’s manual. Avoid touching the chips of the memory module to avoid damage. Check the slots of the memory so that it fits appropriately into the board’s RAM slot. When the memory module is properly inserted, the locks would snap to an upright position and lock the module in place.
Step 6
If the board has no video adapter built in, insert the graphics card in the appropriate slot in the mother board. This may be the AGP or the PCI-e slot, depending on what components you have. A lock would also hold the card in place.
Step 7
Install the CD/DVD-ROM/RW drive in the casing. Screw the drive in place to secure it. Connect the drive to the board using the IDE cable that came in the package. An IDE slot should be available on the board.

Step 8
Mount the hard disk in the casing. Screw the drive in place to secure it. Connect the hard disk using the appropriate cable that came in the package. This may be an IDE or a SATA cable. An available IDE or SATA slot should be available on the board.
Step 9
Connect the casing’s power, reset, and LED pins to the motherboard. The appropriate pins on the motherboard can be seen on the manual.
Step 10
Connect the power supply to the board. There is a power slot on the board which should have the same number of pins as the power supply. These may be 20- or 24-pin ends.
Step 11
Connect the other power cables to the other components. The CD/DVD-ROM/RW drive and the hard disk must each have a power cable connected to them.
Step 12
Screw the cover of the casing in place.

Step 13
Attach the CRT or LCD monitor power cable to the power supply. If there is no slot on the supply, then the monitor plugs directly into an outlet. Connect the VGA or DVI cable of the monitor to the graphics port of the system. This may be the built-in port or the port of the installed graphics card in Step 6.

Step 14
Attach the mouse and keyboard to the appropriate ports. If a ps/2 mouse and a ps/2 keyboard were bought, attach them to the ps/2 ports at the back of the system. A USB mouse or keyboard should be attached to the USB slots.


For video tutorials :- 
http://www.google.lk/search?q=assemble+a+computer&hl=en&biw=1024&bih=653&prmd=ivns&source=univ&tbm=vid&tbo=u&sa=X&ei=nq3kTaekKIP5rQeG5fi4Bg&sqi=2&ved=0CDwQqwQ

**********************************************************************************

Monday, May 30, 2011

Parts of a Computer

If you use a desktop computer, you might already know that there isn't any single part called the "computer." A computer is really a system of many parts working together. The physical parts, which you can see and touch, are collectively called hardware. (Software, on the other hand, refers to the instructions, or programs, that tell the hardware what to do.)
The illustration below shows the most common hardware in a desktop computer system. Your system may look a little different, but it probably has most of these parts. A laptop computer has similar parts but combines them into a single notebook-sized package.

Processor (CPU) - The part of the computer that handles all processes
and instructions supplied by memory unit (RAM).

Memory (RAM) - Random Accessed Memory. The area of the computer that
holds the instructions (processes) and information system gives it.
When you turn the computer off, everything in RAM disappears.

Read Only Memory (ROM) - A chip or disk that holds information that
cannot be changed. Ex CD-ROM, DVD-ROM.

Disk drive - A mechanical device that you use to transfer information
back and forth between the computer's memory and a disk.

Floppy disk (3.5") - A magnetically coated disk on which information
can be stored and retrieved. Capacity is 1.44MB - requires a
Floppy-Drive.

Zip disk - A magnetically removable coated disk on which information
can be stored and retrieved. Capacity is 100 or 250MB or more -
requires a zip-drive.

Hard disk - A large capacity storage area that offers access to store
and retrieve information, very slow compare to RAM.

Monitor - A screen that displays the information in the computer.

Keyboard - A device used to enter data and issue commands to the
computer.

Printer or Scanner - A devices that help to make hard copies o scan
documents into the computer.

Mouse - A small, hand-held device used to control the pointer on the
screen.
Software - Instructions that tell your computer how to perform a task.
Software is stored on the disks in program files. Software cannot be
seen or touched. There are two main kinds of software:
* application software and
* system software

Application software (program) - Software that does specific task,
such as word processing. (Word, Power Point)

System software - Software that the computer system or OS operating
system.

Firmware - A kind of system software - instructions that are built
into the
computer system on ROM chips.

Operating System (OS) - software that acts as a link between you,
application software (programs), and hardware. (Windows , Mac OS ,
Linux )

Graphical User Interface (GUI) - A phrase that is commonly used to
describe Microsoft Windows and other OS that use pictures to help you
communicate with the computer
.

**********************************************************************************

History of Computer Science....

     The first computers were people! That is, electronic computers (and the earlier mechanical computers) were given this name because they performed the work that had previously been assigned to people. "Computer" was originally a job title: it was used to describe those human beings (predominantly women) whose job it was to perform the repetitive calculations required to compute such things as navigational tables, tide charts, and planetary positions for astronomical almanacs. Imagine you had a job where hour after hour, day after day, you were to do nothing but compute multiplications. Boredom would quickly set in, leading to carelessness, leading to mistakes. And even on your best days you wouldn't be producing answers very fast. Therefore, inventors have been searching for hundreds of years for a way to mechanize (that is, find a mechanism that can perform) this task.


The abacus was an early aid for mathematical computations. Its only value is that it aids the memory of the human performing the calculation. A skilled abacus operator can work on addition and subtraction problems at the speed of a person equipped with a hand calculator (multiplication and division are slower). The abacus is often wrongly attributed to China. In fact, the oldest surviving abacus was used in 300 B.C. by the Babylonians. The abacus is still in use today, principally in the far east. A modern abacus consists of rings that slide over rods, but the older one pictured below dates from the time when pebbles were used for counting (the word "calculus" comes from the Latin word for pebble).


In 1617 an eccentric (some say mad) Scotsman named John Napier invented logarithms, which are a technology that allows multiplication to be performed via addition. The magic ingredient is the logarithm of each operand, which was originally obtained from a printed table. But Napier also invented an alternative to tables, where the logarithm values were carved on ivory sticks which are now called Napier's Bones.


Napier's invention led directly to the slide rule, first built in England in 1632 and still in use in the 1960's by the NASA engineers of the Mercury, Gemini, and Apollo programs which landed men on the moon.


Leonardo da Vinci (1452-1519) made drawings of gear-driven calculating machines but apparently never built any.


The first gear-driven calculating machine to actually be built was probably the calculating clock, so named by its inventor, the German professor Wilhelm Schickard in 1623. This device got little publicity because Schickard died soon afterward in the bubonic plague.


In 1642 Blaise Pascal, at age 19, invented the Pascaline as an aid for his father who was a tax collector. Pascal built 50 of this gear-driven one-function calculator (it could only add) but couldn't sell many because of their exorbitant cost and because they really weren't that accurate (at that time it was not possible to fabricate gears with the required precision). Up until the present age when car dashboards went digital, the odometer portion of a car's speedometer used the very same mechanism as the Pascaline to increment the next wheel after each full revolution of the prior wheel. Pascal was a child prodigy. At the age of 12, he was discovered doing his version of Euclid's thirty-second proposition on the kitchen floor. Pascal went on to invent probability theory, the hydraulic press, and the syringe. Shown below is an 8 digit version of the Pascaline, and two views of a 6 digit version:


Pascal's Pascaline [photo © 2002 IEEE]

A 6 digit model for those who couldn't afford the 8 digit model

A Pascaline opened up so you can observe the gears and cylinders which rotated to display the numerical result.
**********************************************************************************